removing tach drive seal from R90S (slash 6)
November 10, 2016
William F. Dudley Jr., NJ Airmarshal
This technique was, I believe, suggested by Tom Cutter on the Airheads mailing list. It involves drilling two small holes in the old seal and then putting two small screws in the holes, and using the screws to lift the seal out.
Assuming you're doing this with the engine in the frame, which is the point of this article, then a regular drill won't fit in the space between the frame tube and the front of the engine. So you'll need some kind of very narrow drill. I used the flexible shaft attachment for my "Dremel" knock-off.
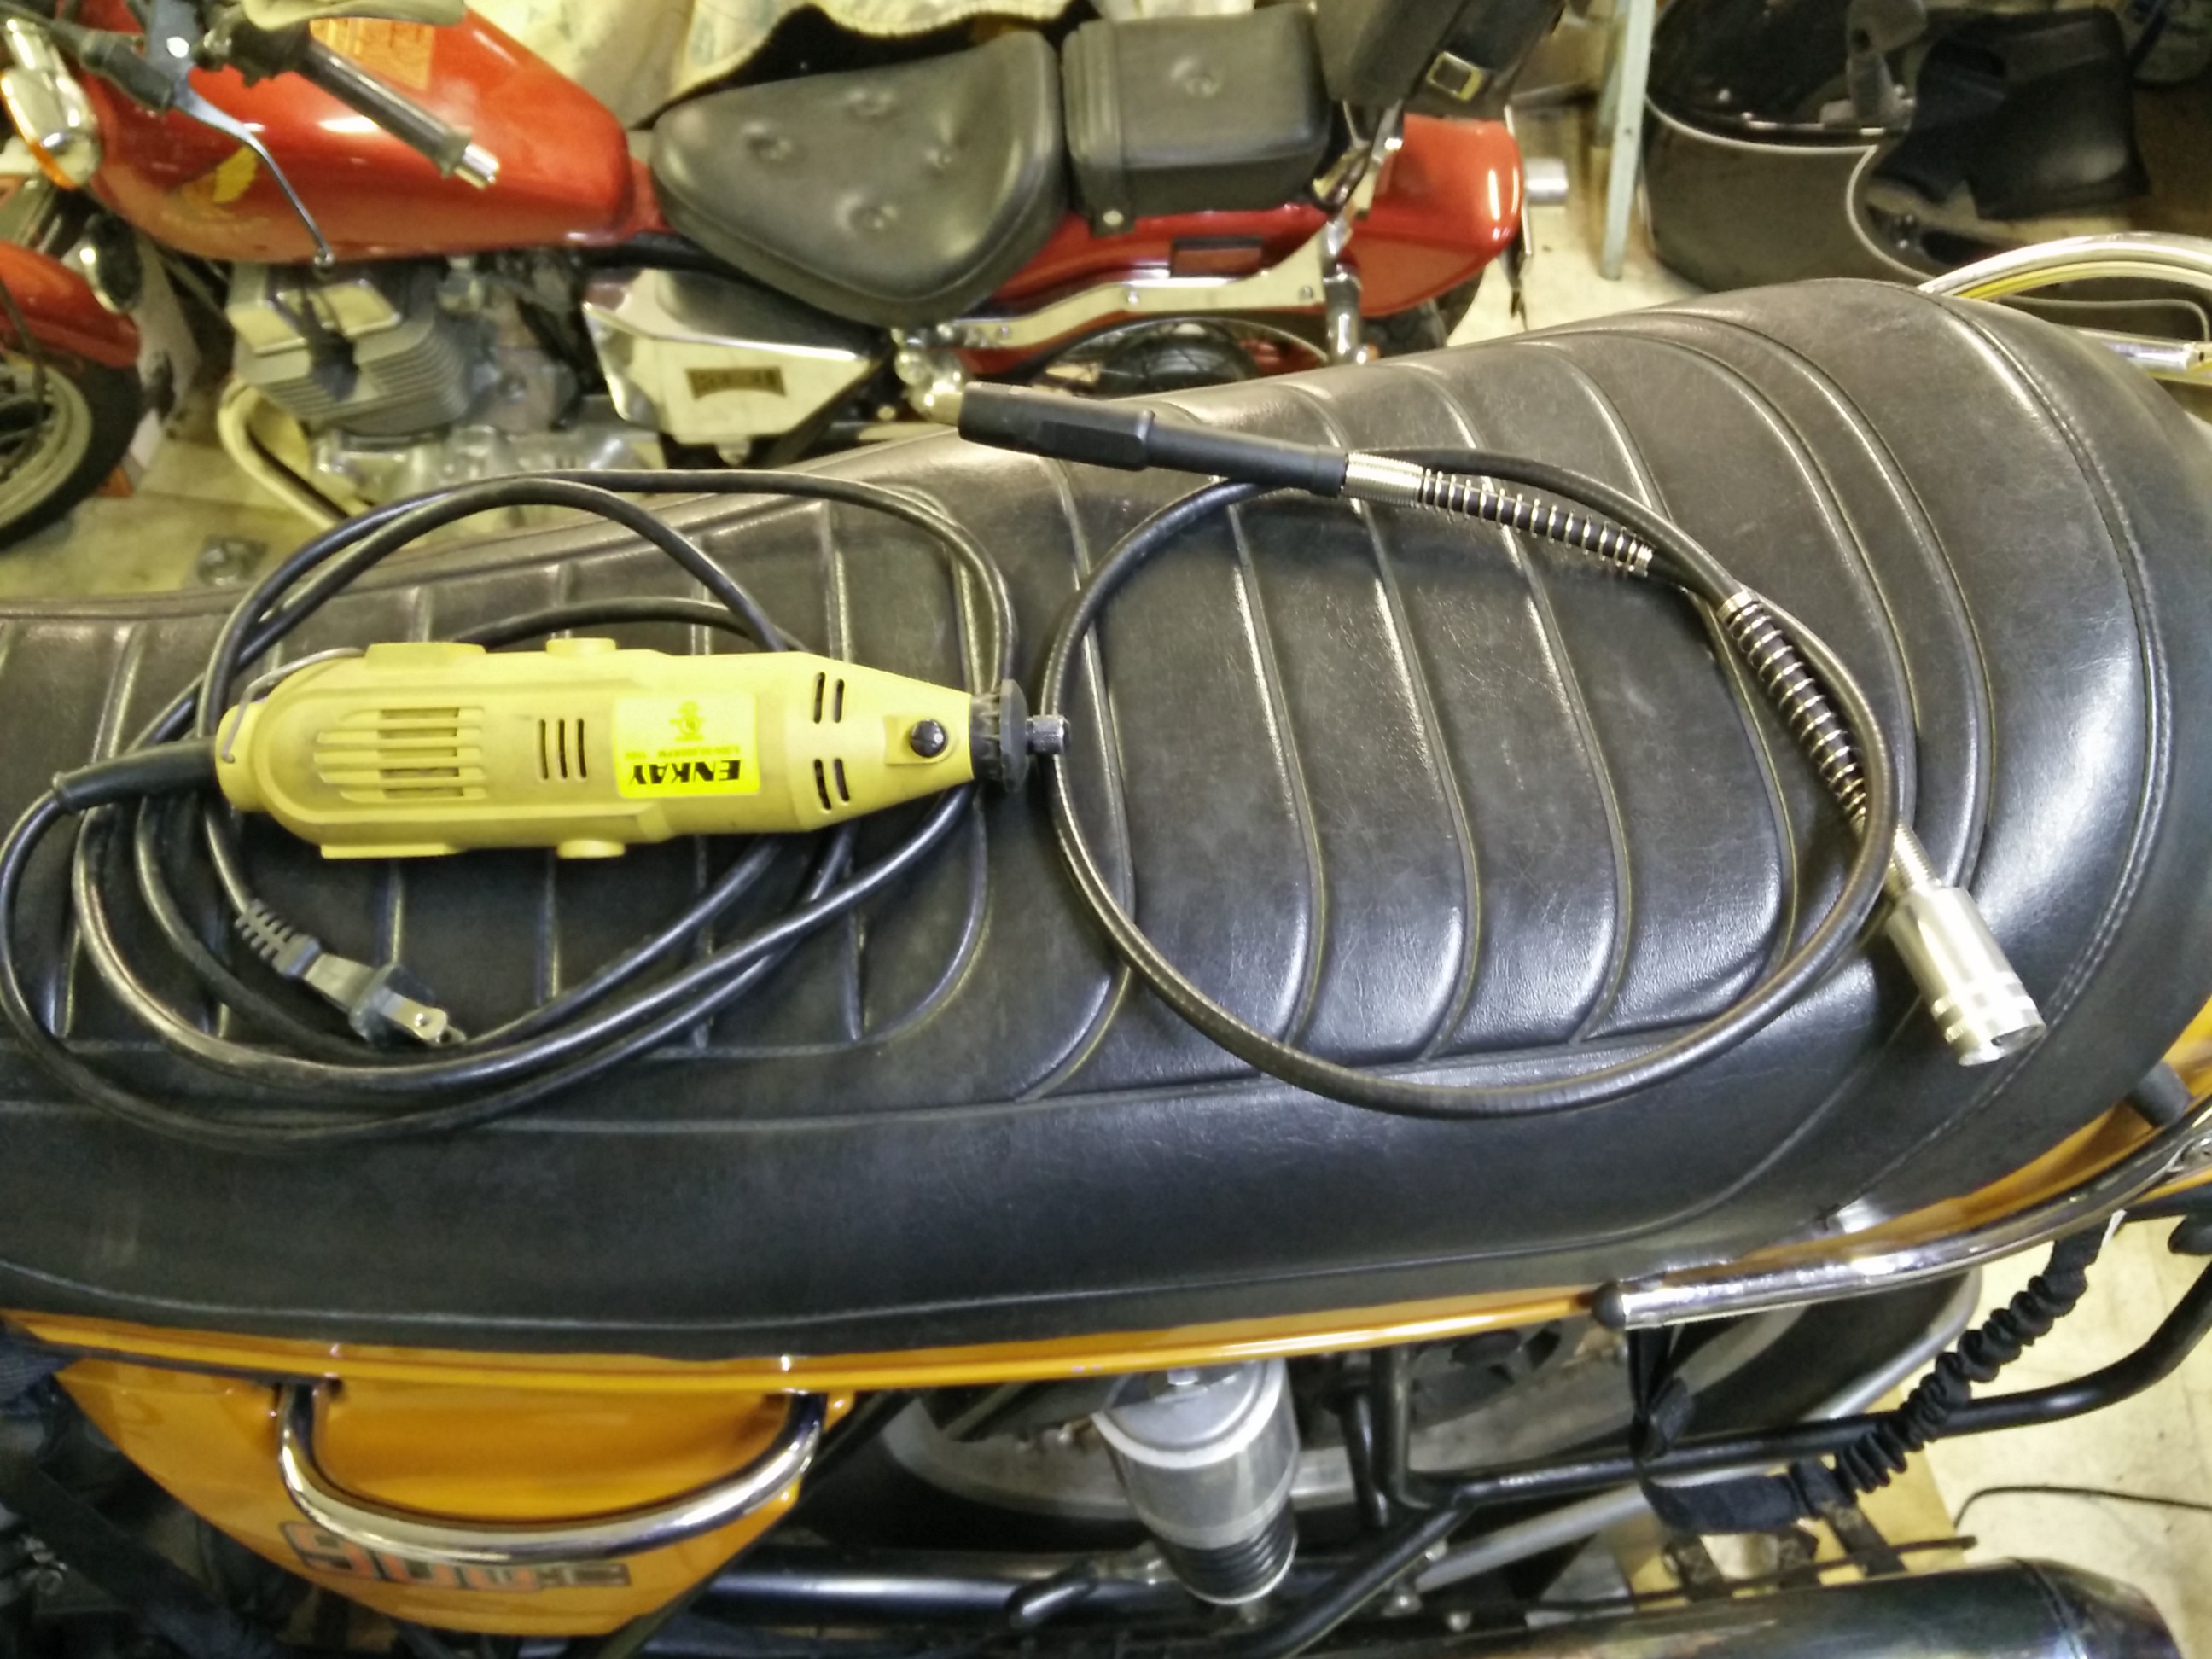
Here is the knock-off "Dremel".
Harbor Freight sells one just like this, but it doesn't (currently, Nov 2016) come with the flexible shaft. They do have this.
Here it is with the flexible shaft attached.
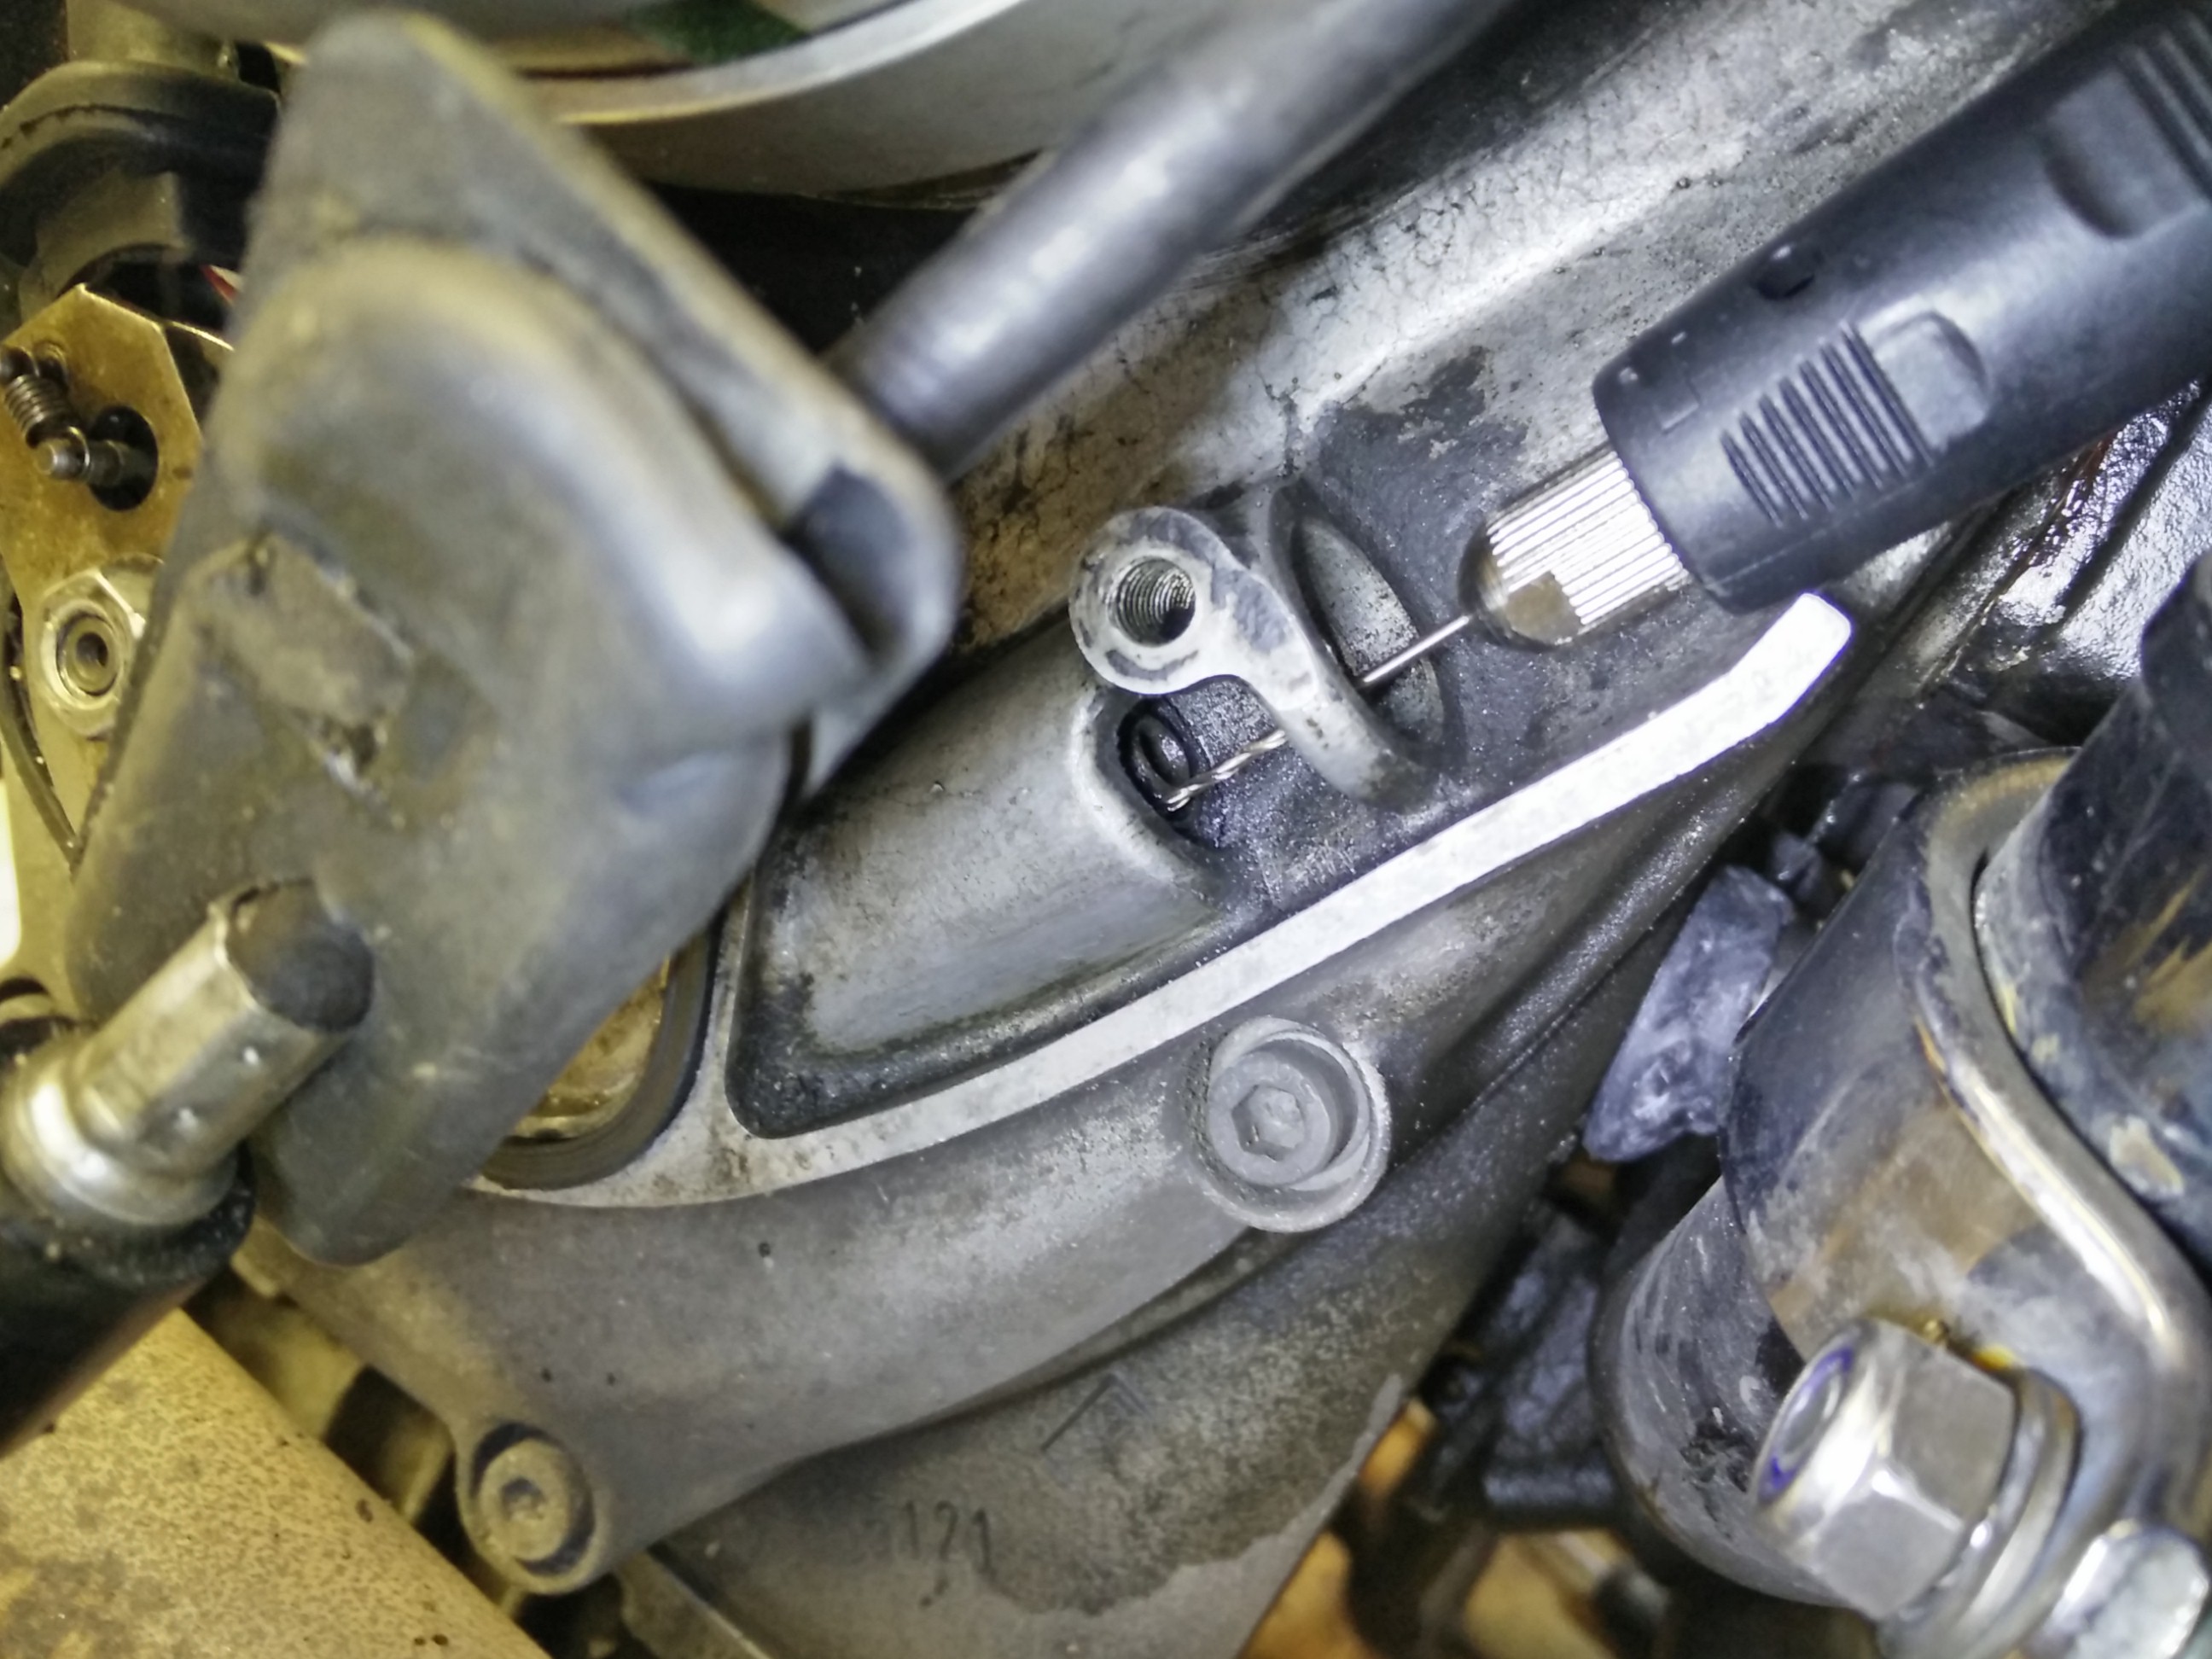
I've chucked a #55 drill in there and this shows how little room there is.
I had to temporarily remove the "nut" that holds the timing cover on that is just above the cutout that the tach cable passes through.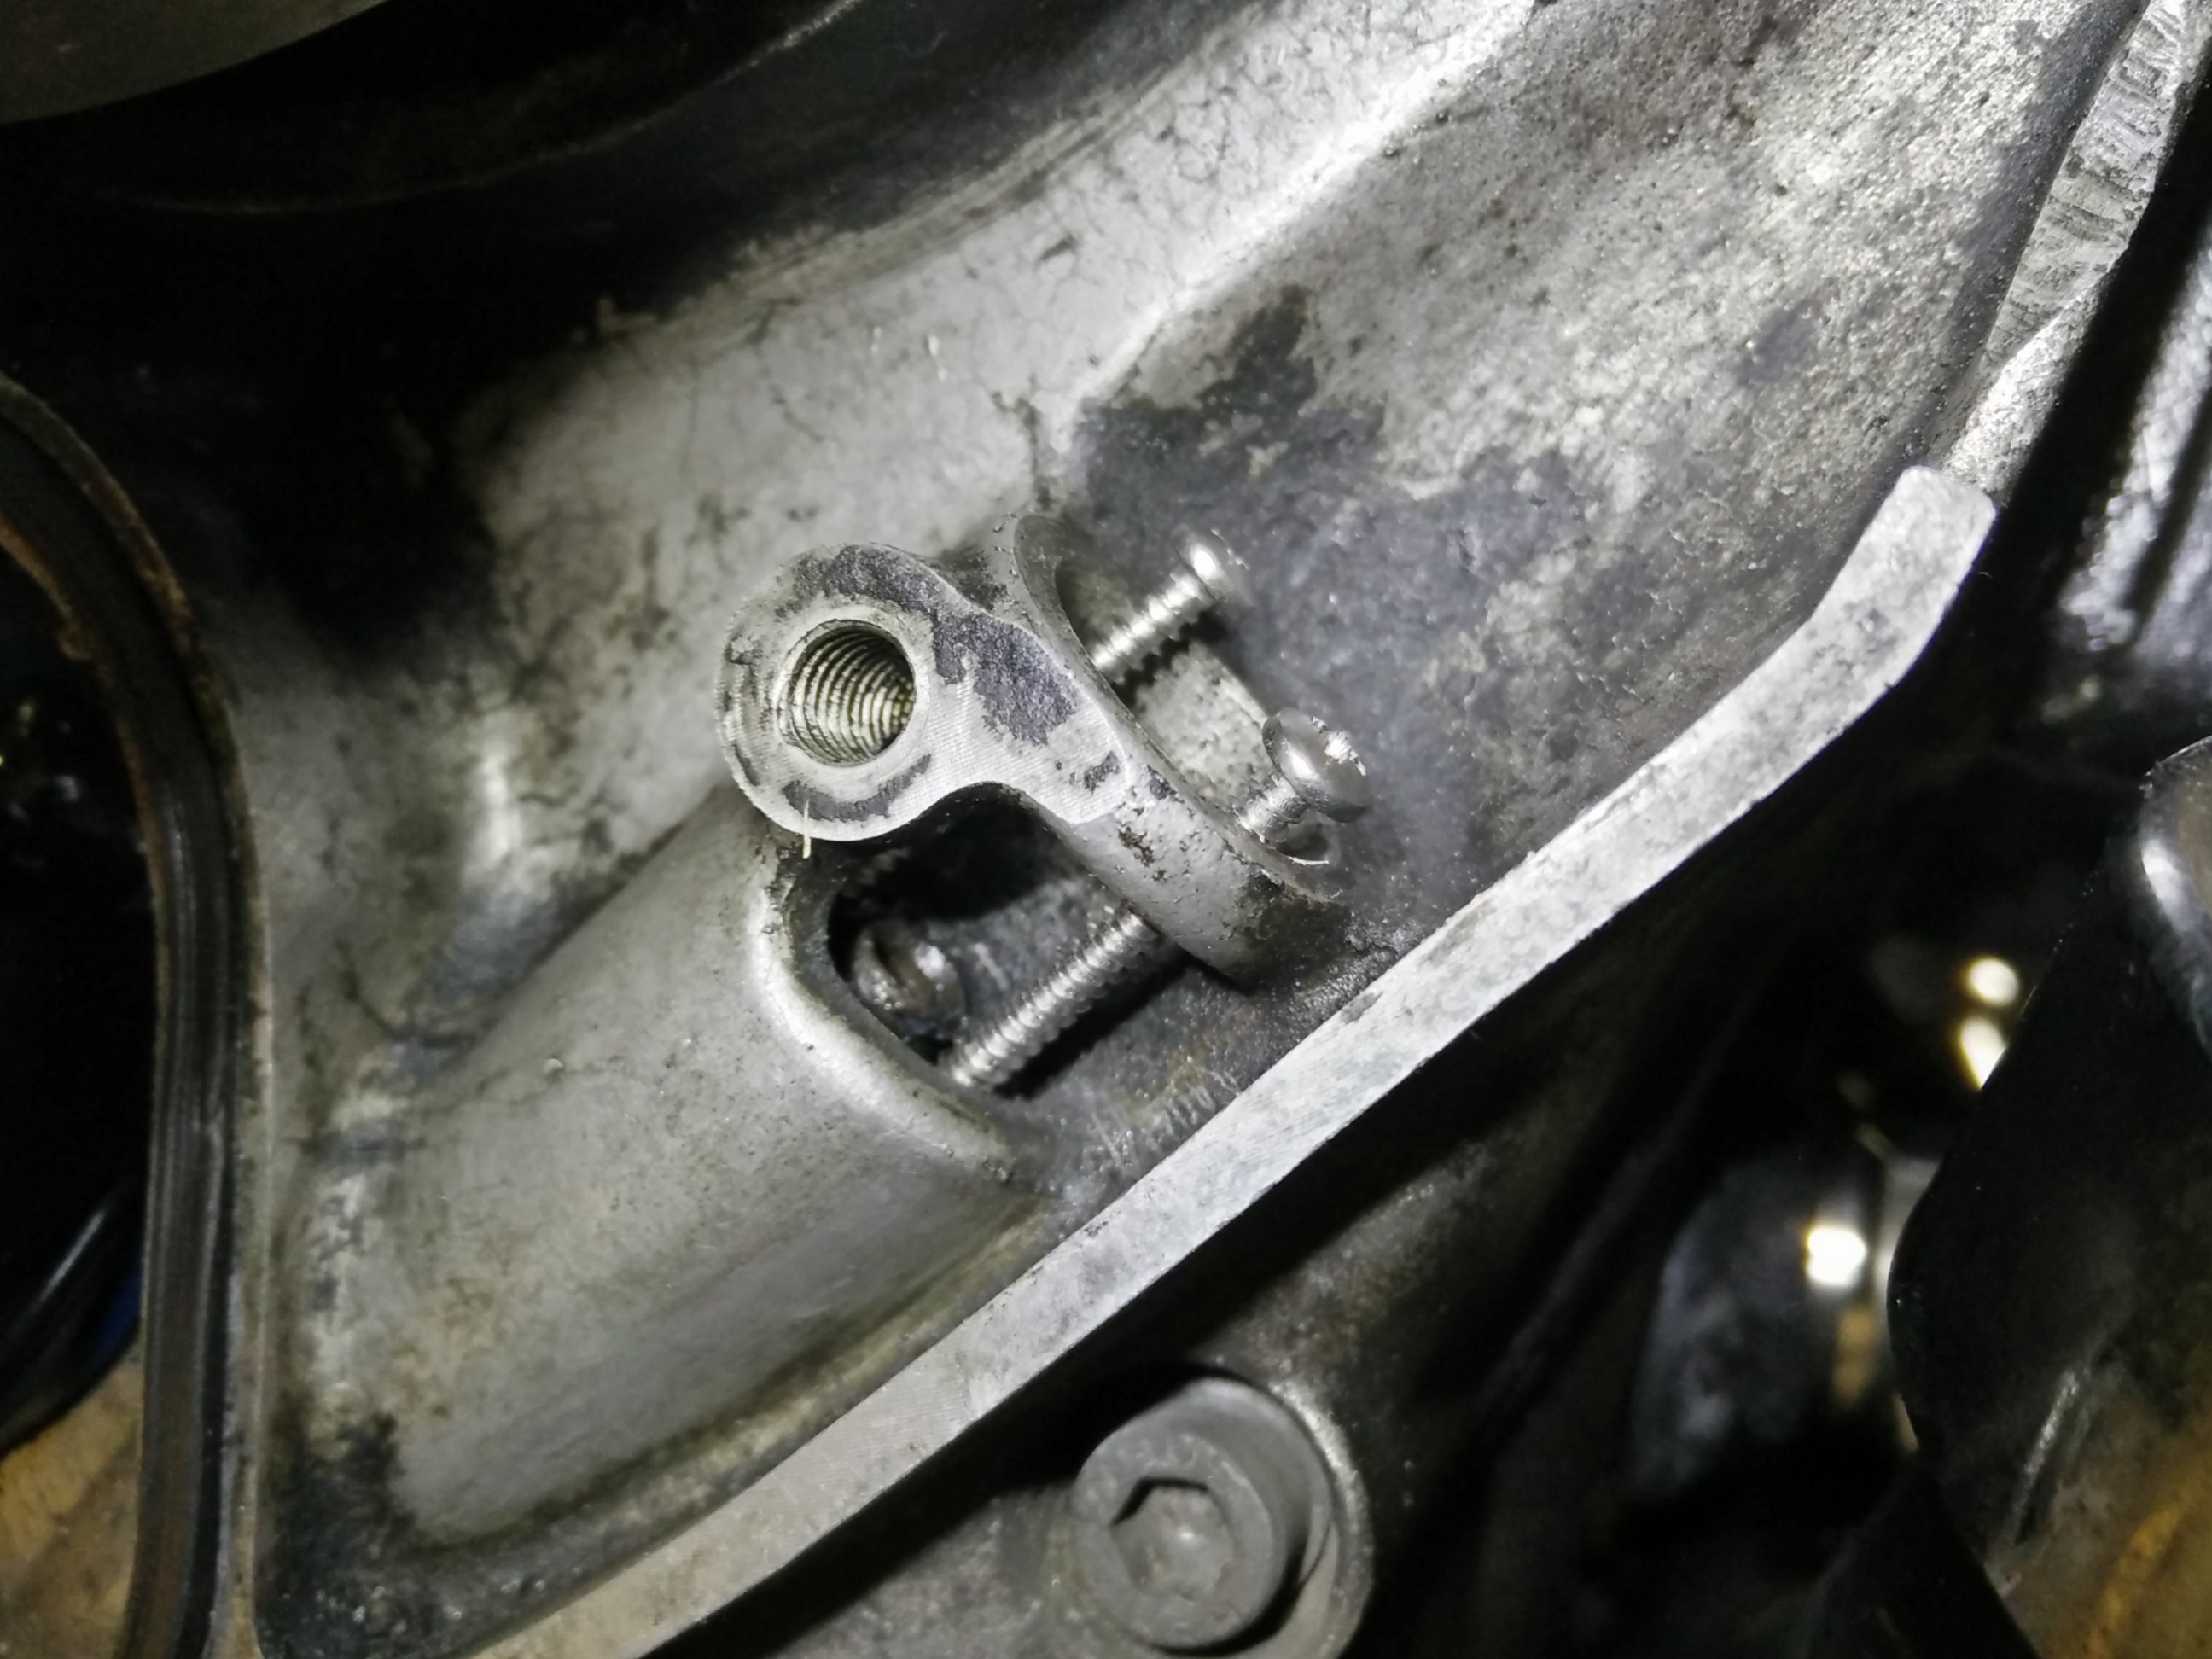
I've drilled two holes in the top of the seal and screwed in two (long) #4 sheet metal screws.
The seal is almost all the way out.
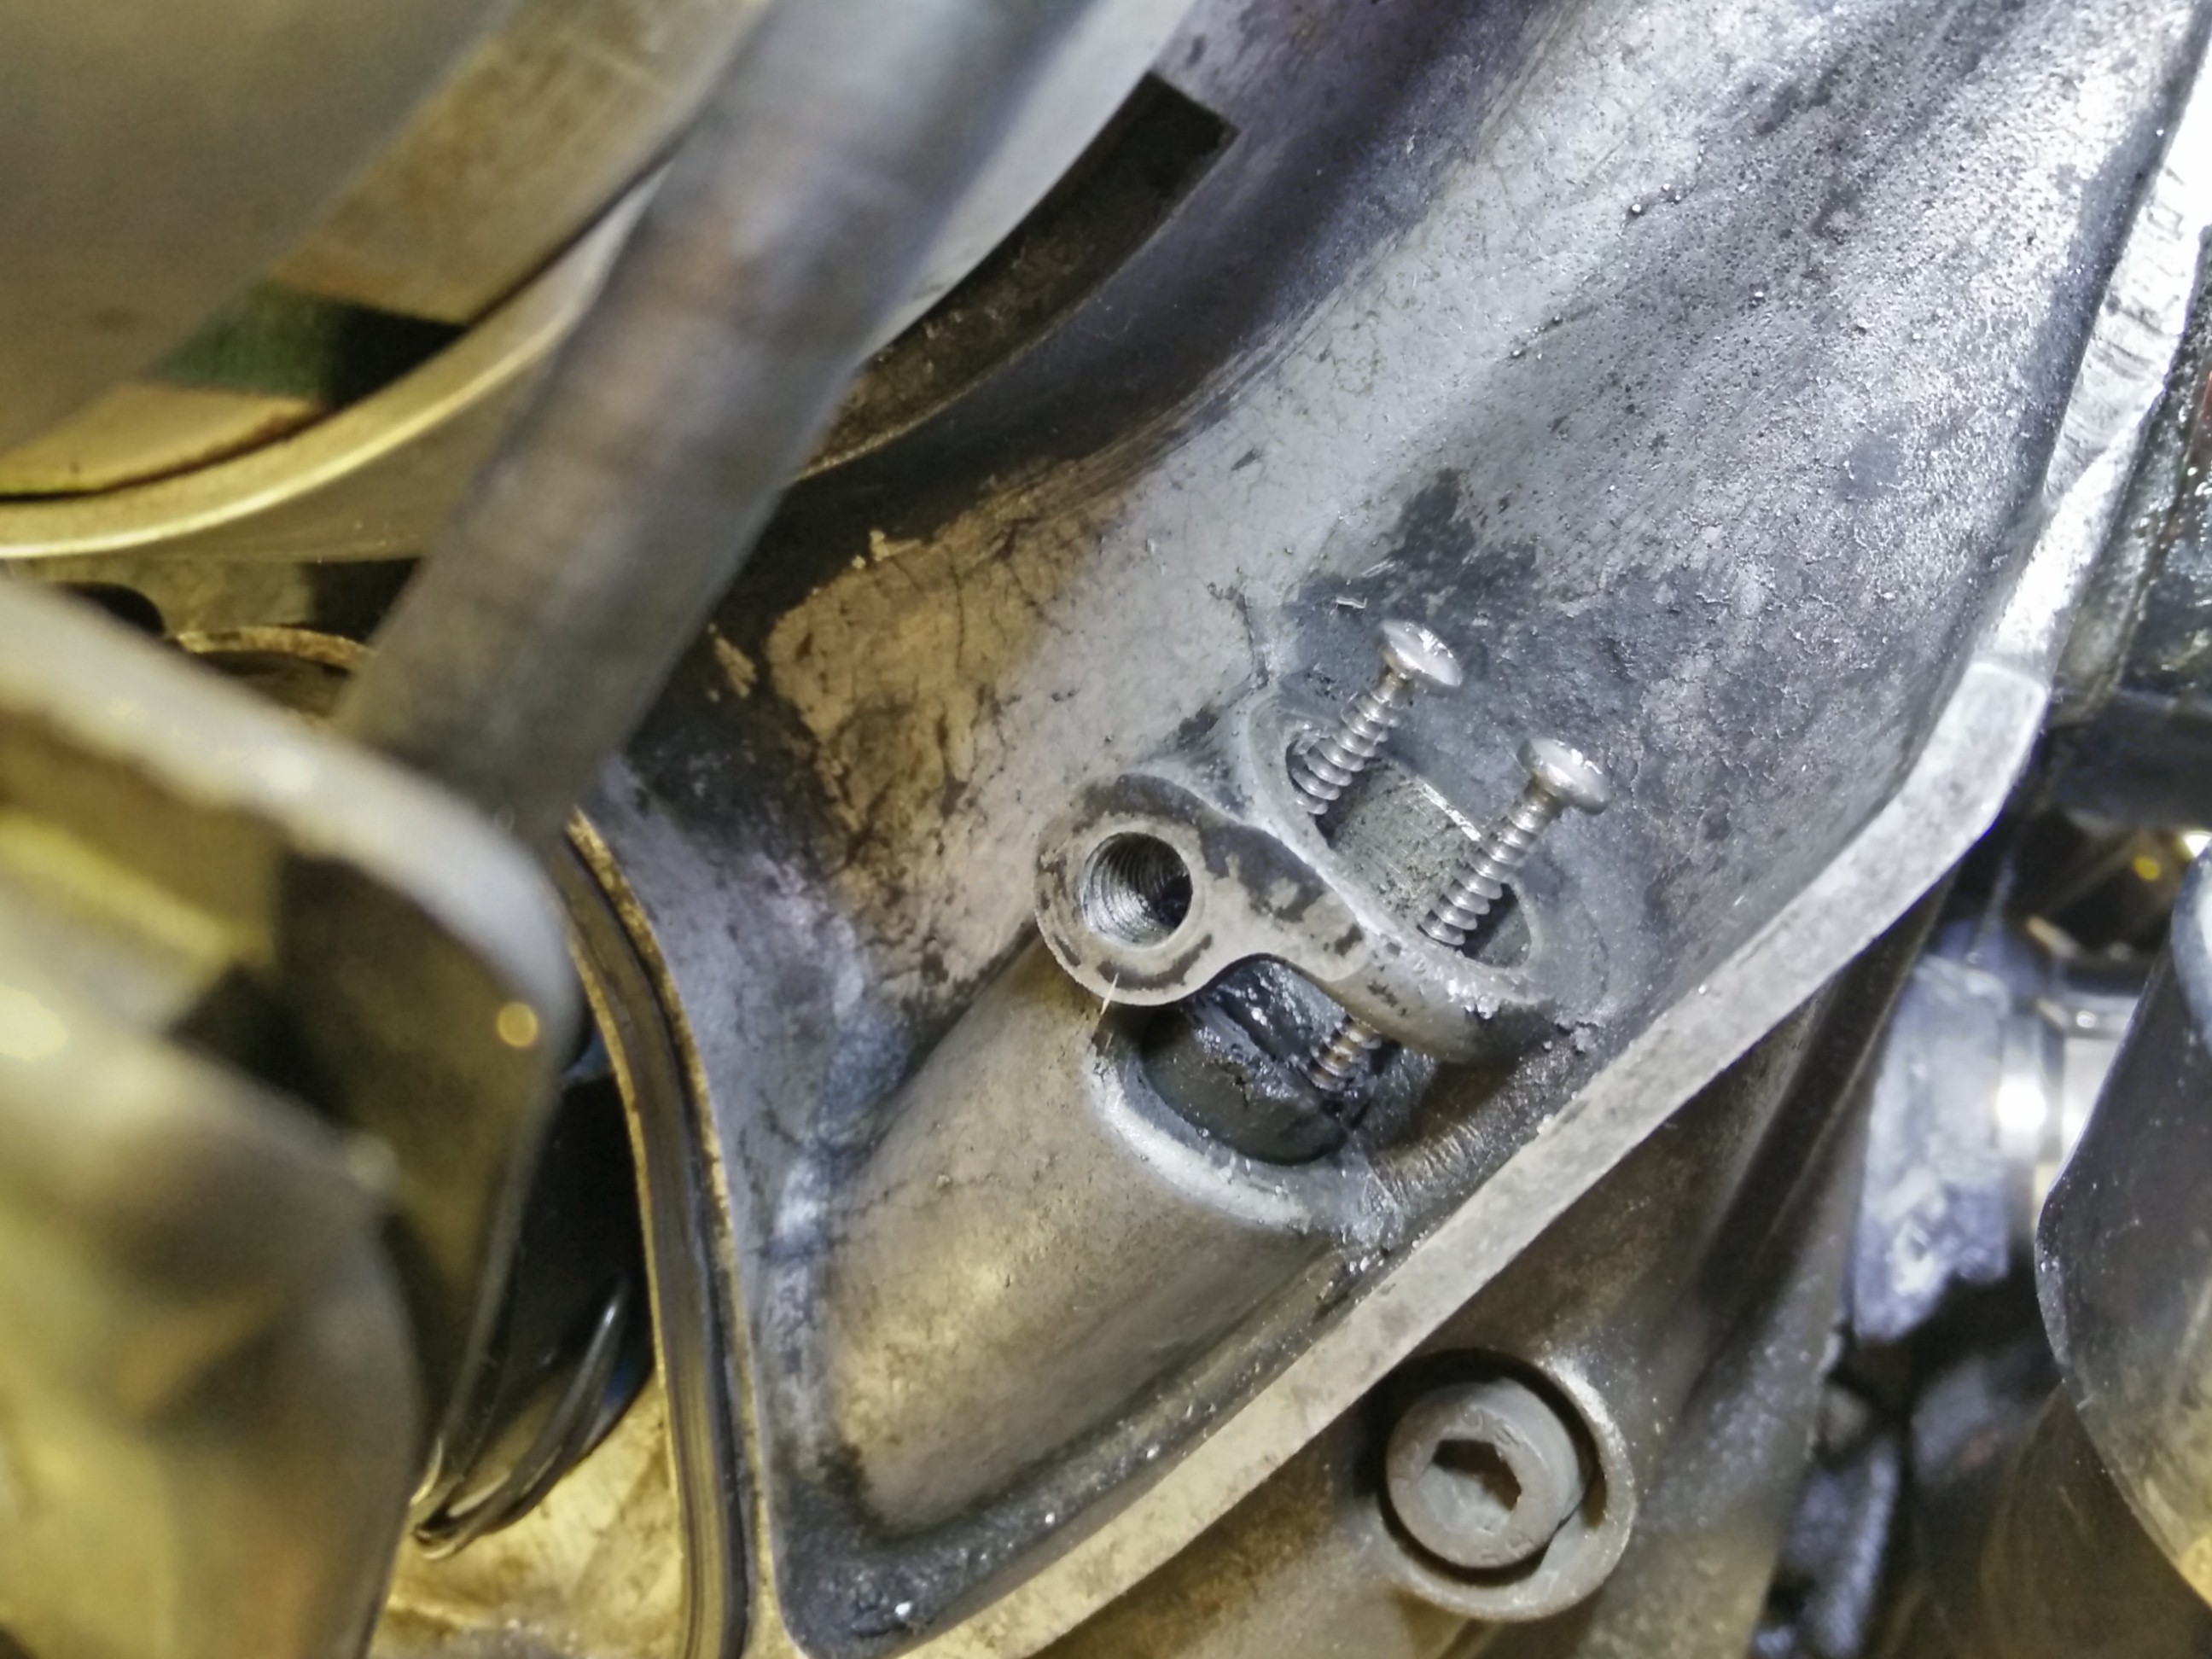
I levered it out by using a teeny tiny pry bar to lift the screw heads, a little at a time on each side.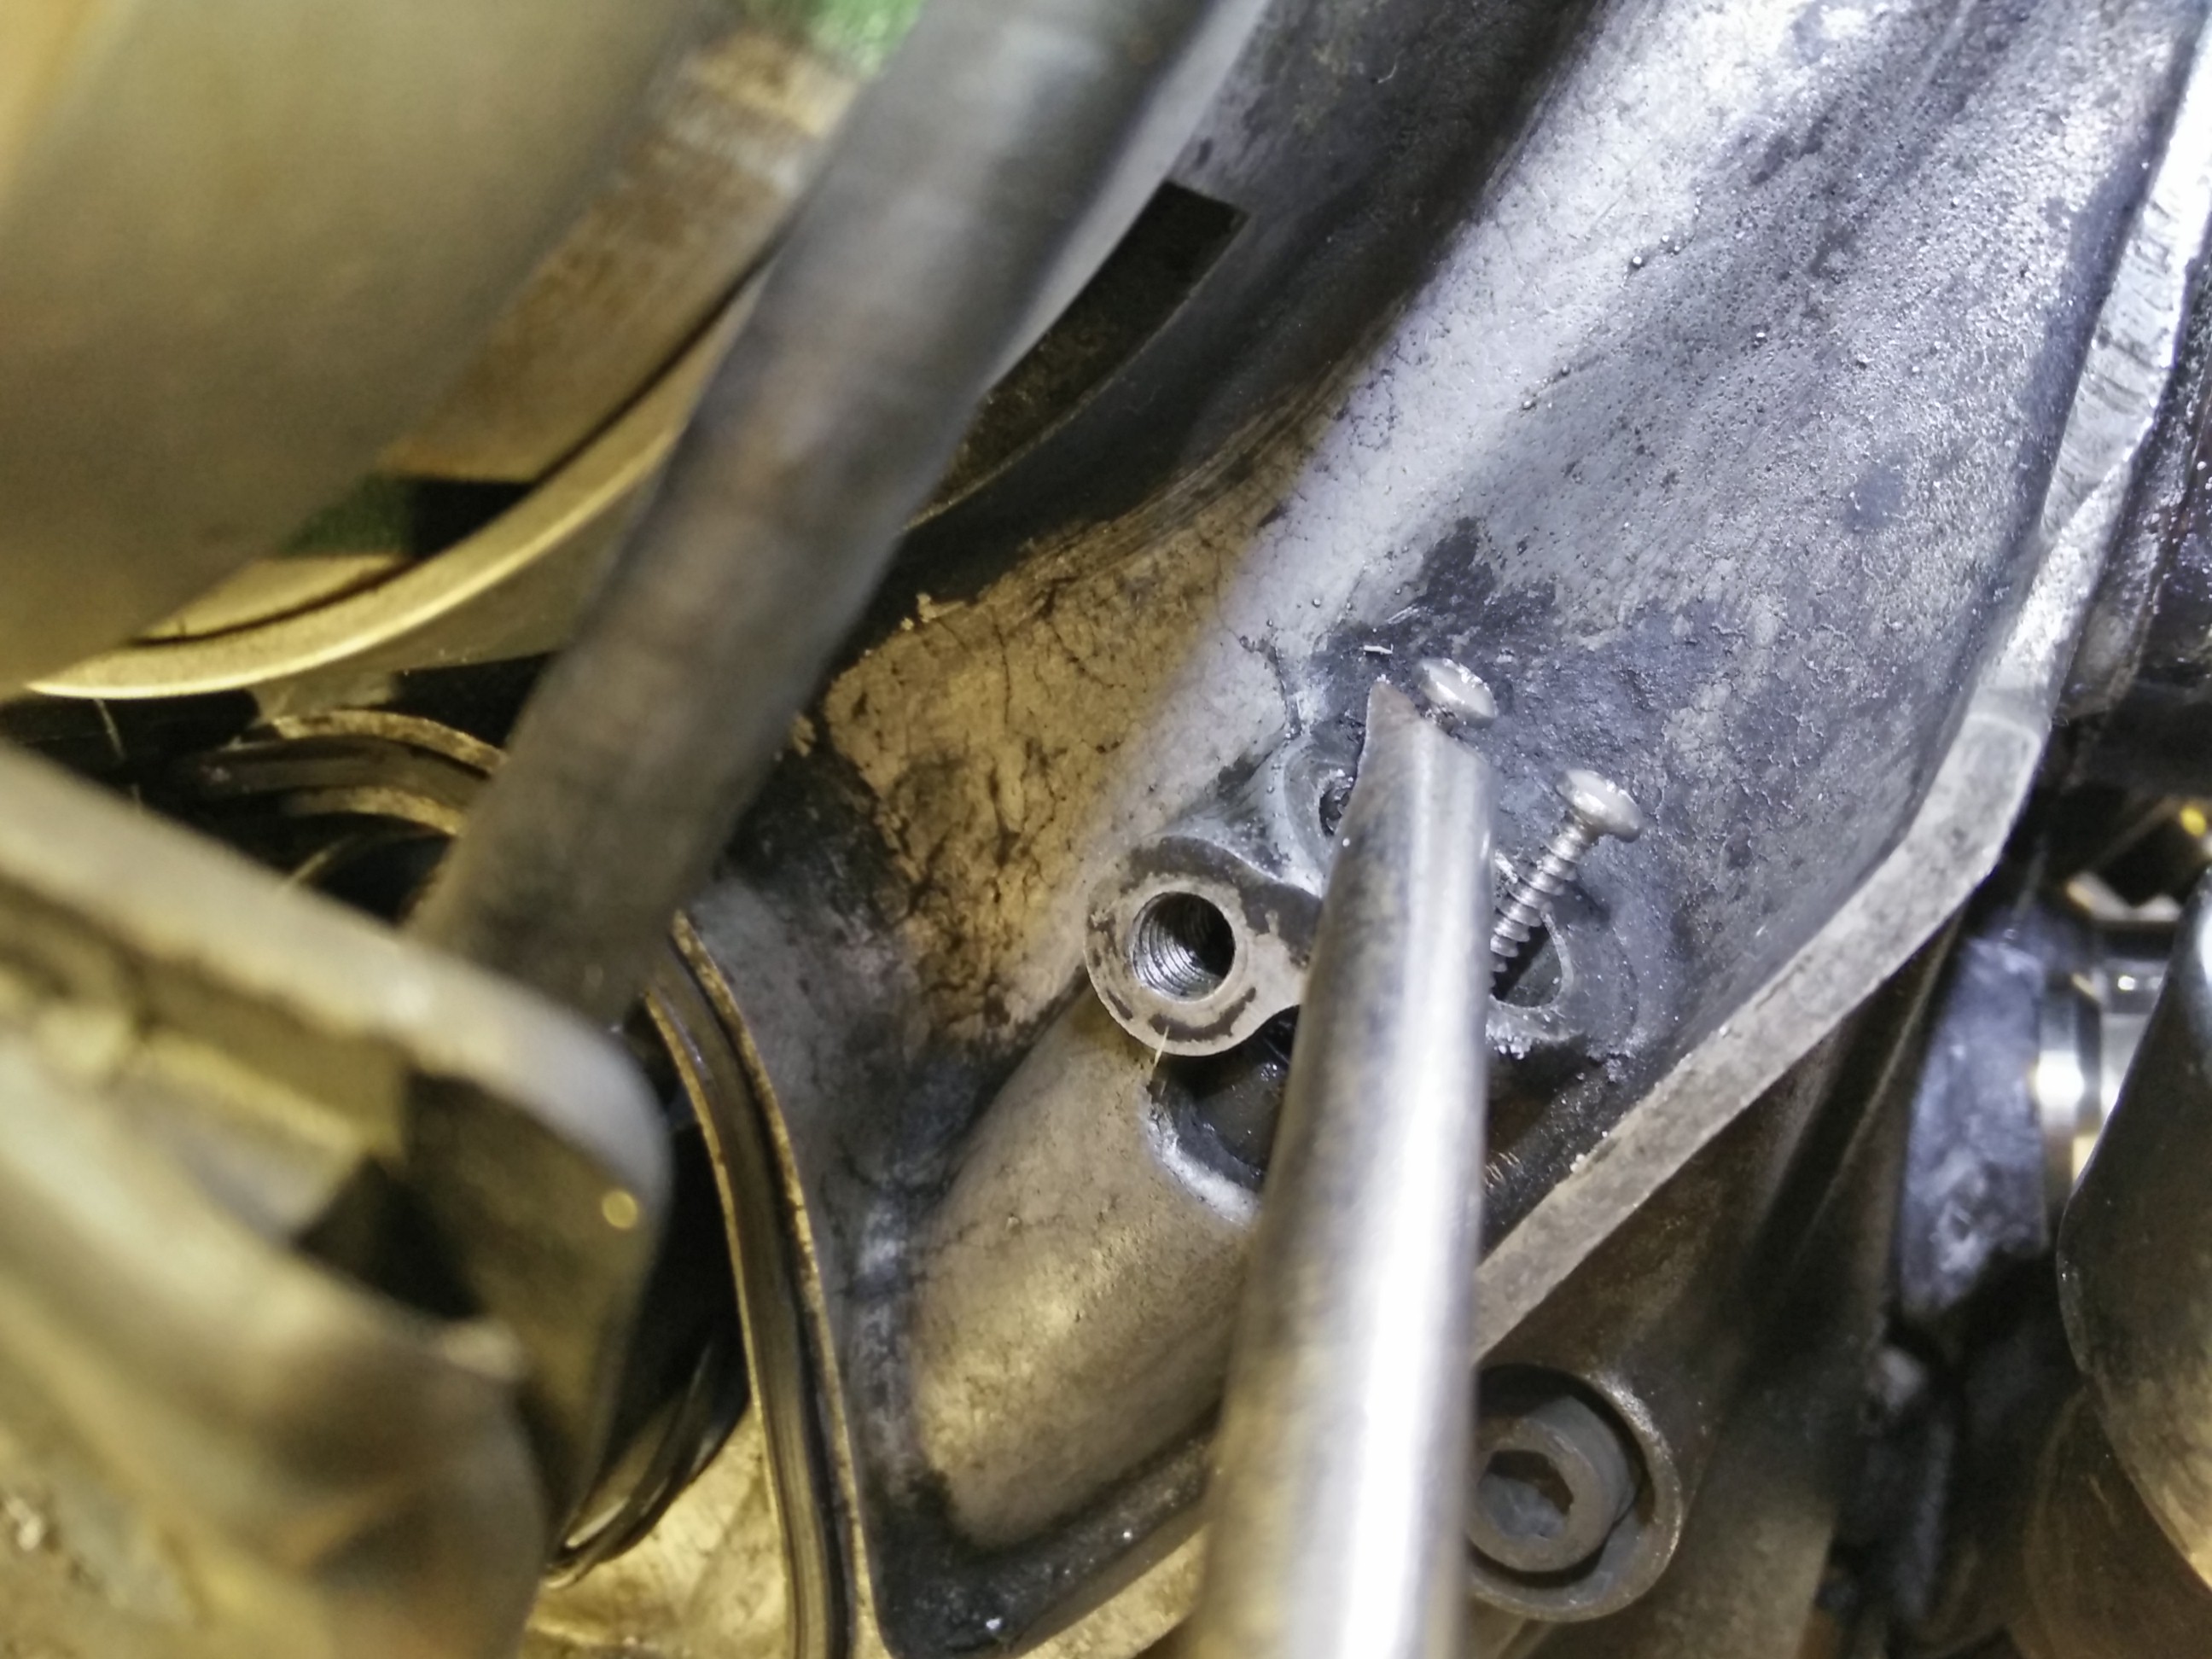
This is what it looks like with the pry bar in place.
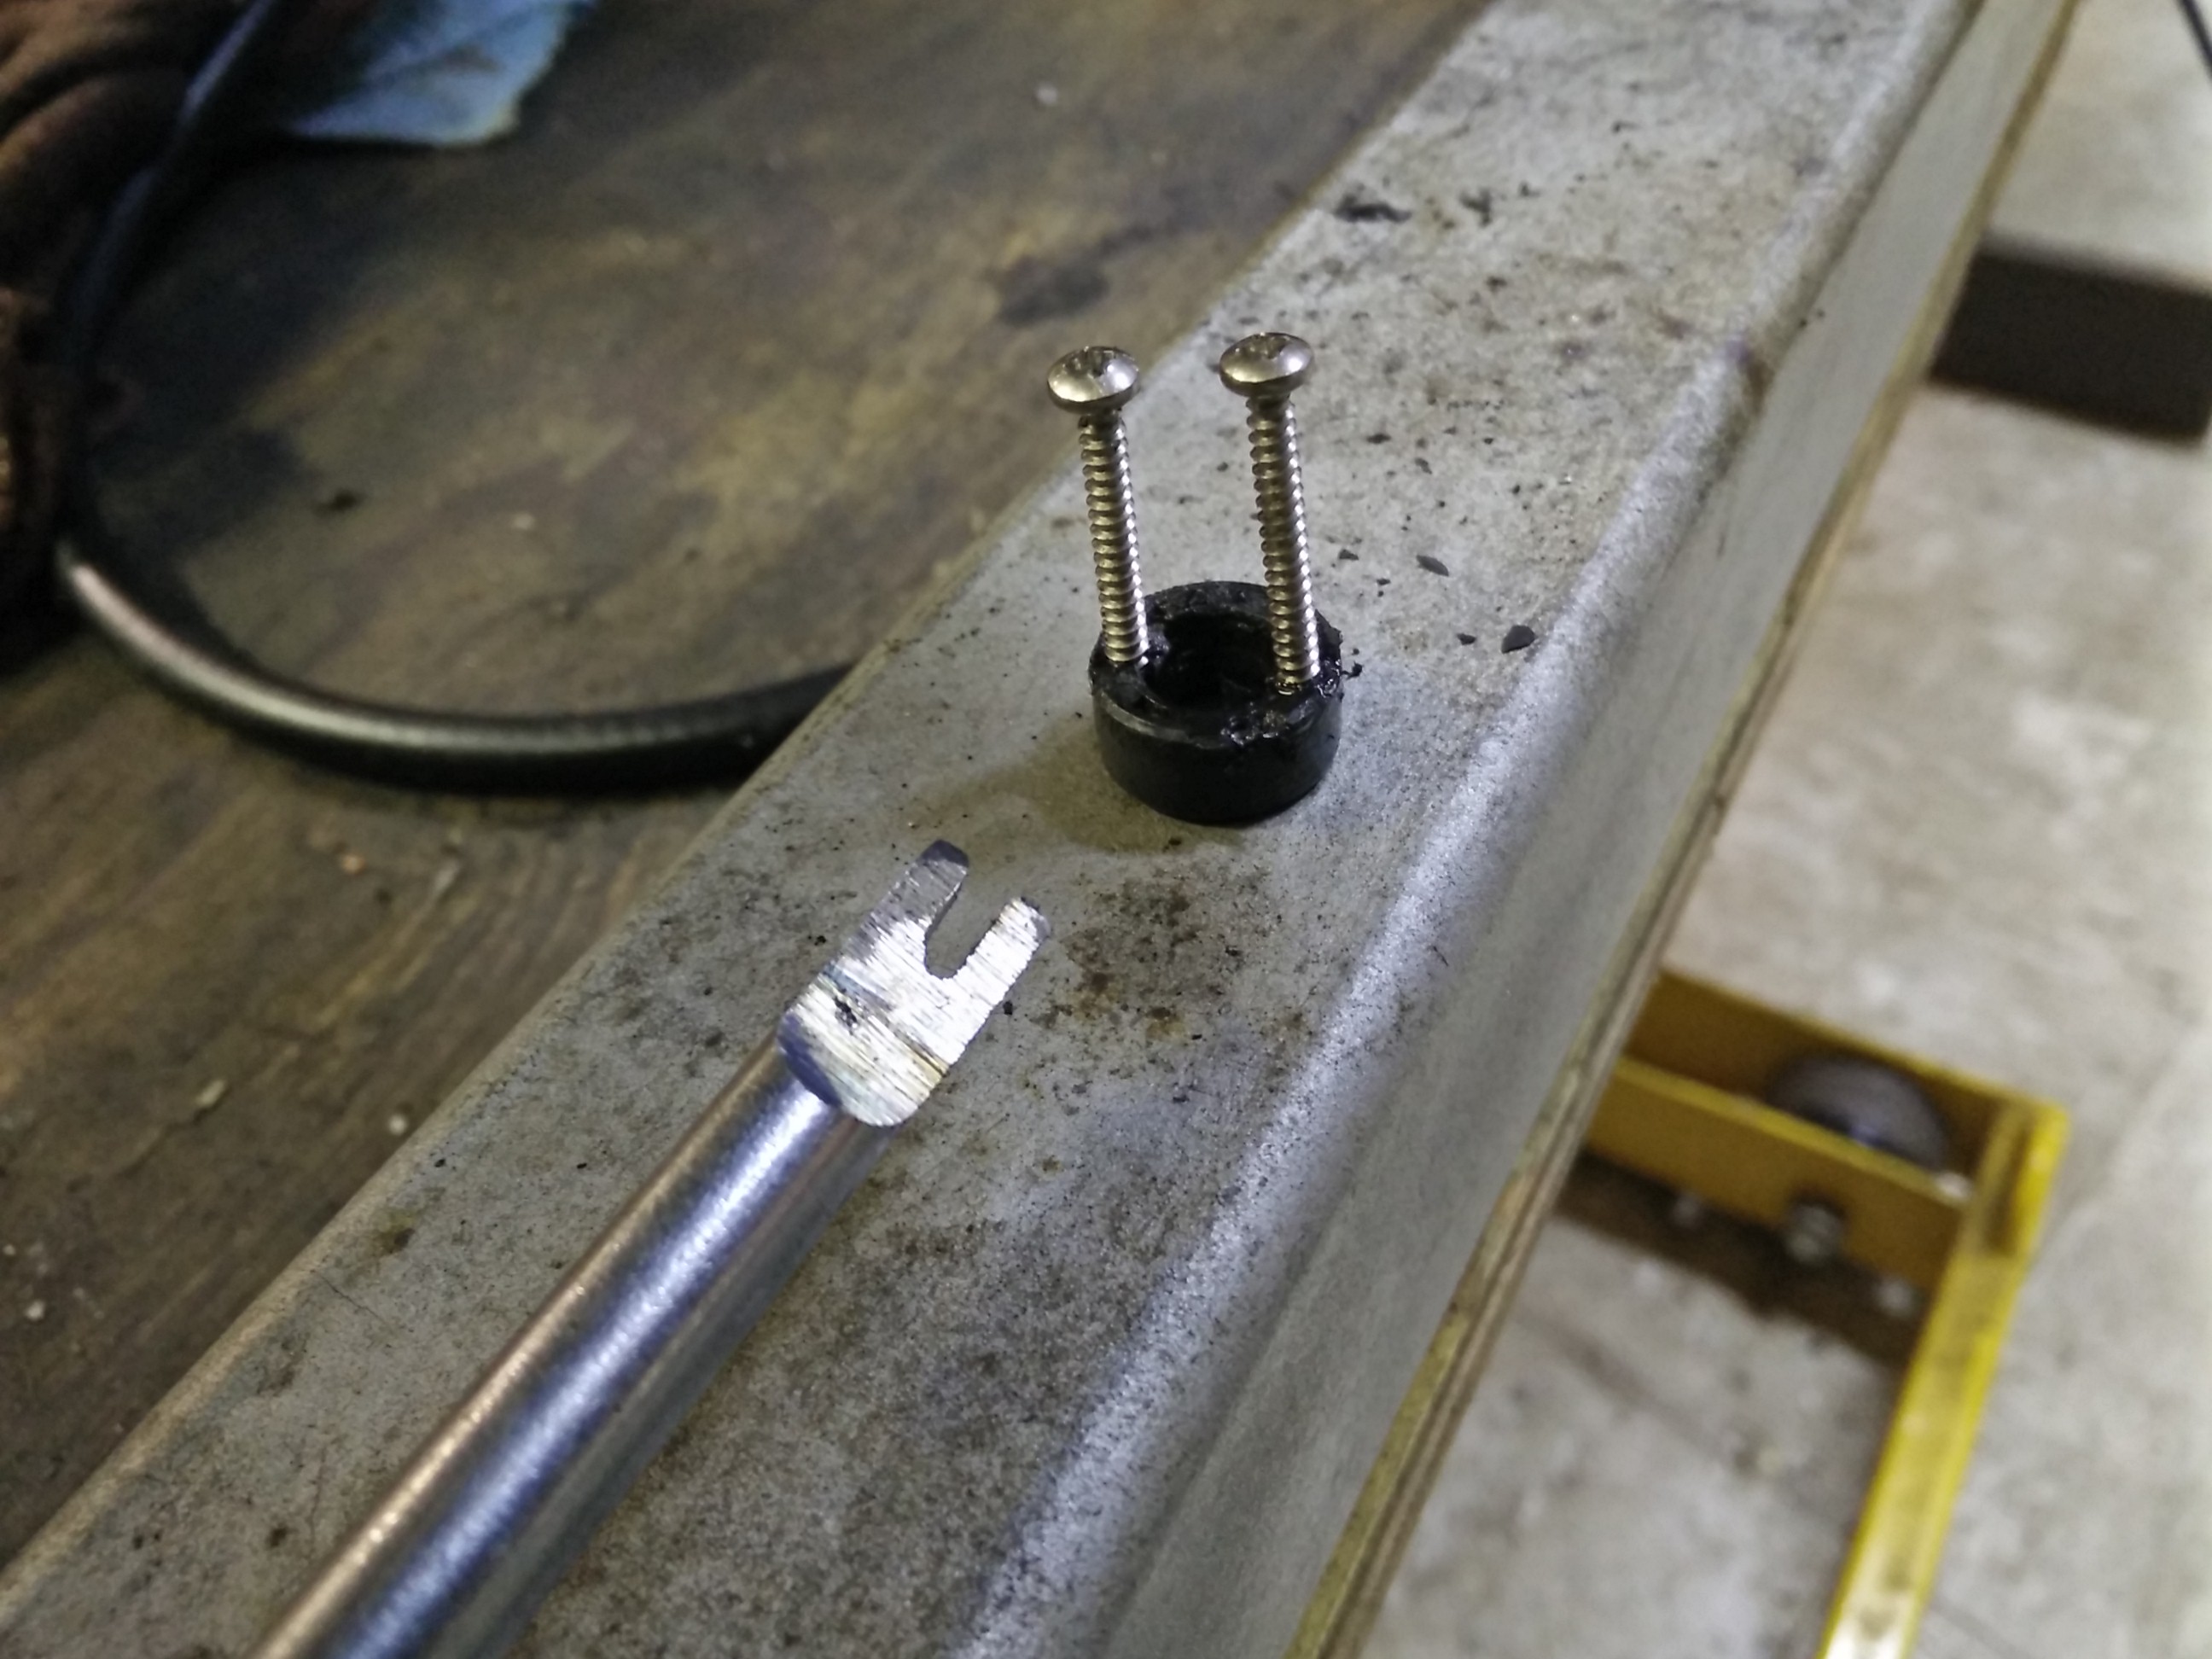
Success! This is the removed seal, and the screwdriver that I modified into a tiny pry bar.
Yes, that's a Honda Rebel in the background of the first photo.